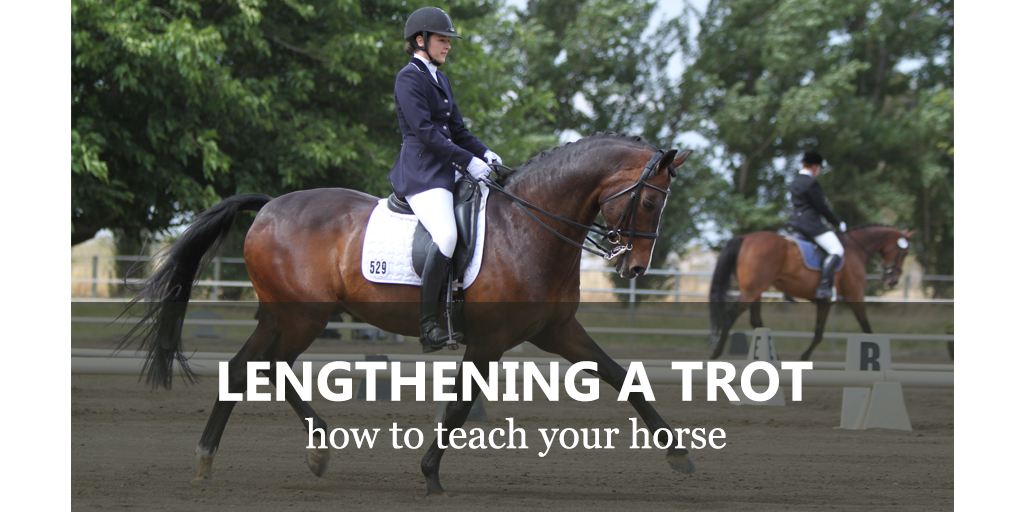
Does your horse try to fight you when you attempt to lengthen his gait at a trot? Does he speed up or tries to shift into a canter instead of taking bigger steps? It's normal that not all horses have the natural ability of lengthening their gait while trotting. At the other hand, some horses seem to have been born with it. However, the truth is every horse can learn how to lengthen the trot stride due to well-thought trainings and patient, repeated exercises.
Introduction
One of the first lessons we give our horses during his training process is teaching him that touching him with our calf means "go." Initially horses interpret the calf as a "take a step" signal. However, in the next phases of trainings, horses learn to differentiate our calf signals. Depending on its placing, action and strength, the horse reads our intention and expectation.
When the horse is on a more advanced level of training, due to the use of calf we can ask him to engage his hind legs, which should go deeper under the belly, due to which his croup muscles work better (we say that his croup is more engaged). It allows him to take more energetic and longer steps, without accelerating and changing the pace. In order to learn how to do this on demand, the horse has to understand that while you use your calves, you direct the request towards his hind legs.
Two ways of achieving the goal
In this article, we'll try to describe two most effective ways of achieving lengthened trot. We'll show you methods which will allow your horses to notice the connection: rider's calf = increased action of hind legs and execute your order properly.
The first method will show your horse how to react when he feels a properly pressed rider's calf. This way improves the level of acceptance and understanding of the rider's legs by the horse. It also improves the horse's shoulders' mobility and croup's engagement.
The second method uses poles placed on the ground to encourage your horse to gradually lengthen his stride without losing balance.
Before you choose a method, think about the plan for training your horse. Probably it will take him a couple, if not a dozen trainings before he gets the mere idea of taking longer steps without speeding up the pace. Just like while introducing new exercises, the best way to help your horse get used to your new demands and in order to avoid his resistance, you should apply the method of baby steps to achieve your goal. You can be sure that if your horse understand each phase of the training and every demand you have, he will be content and relax, at the same time willing to move to next phases of training.
Start working on lengthening the trot about three times a week (or less if your trainings take place less than 4-5 times a week). As time goes by, limit the time spent on exercising, slowly including the lengthening to the classic set of tasks your horse performs each time he trains. However, be careful not to cross the line. Imagine a gym coach, who puts you through the hoops every time you come to train. After a couple of such days, you would probably look for any excuse to never go there again. Your horse will feel exactly the same. So try to make sure that your horse is content and tired, but not completely exhausted after a training! The way in which you finish your training will determine if your horse wants to come to the next one and what his attitude will be.
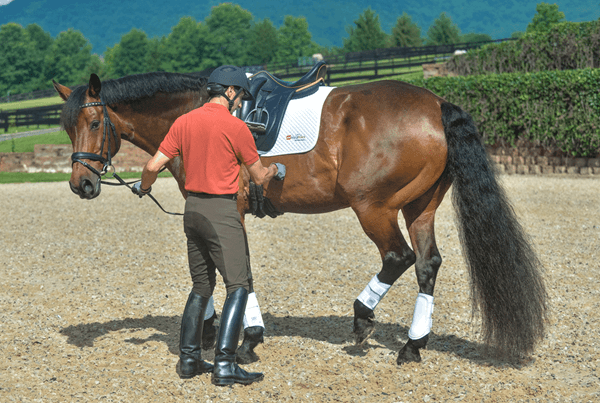
source: practicalhorsemanmag.com, phot. Amy K. Dragoo
First method
Step 1 - turns on the front
In order to teach your horse how to move on his back legs in accordance with your calf's pressure, you should start training from teaching him turns on the front. In this exercise, your horse will move his hind legs to the side, pivoting around front legs (to be more precise, around the front inner leg). The back moves, while the front stays in place. Horses usually learn this quite quickly if you teach them to do this from the ground in a hand earlier on.
Turns on the front - teaching from the ground in a hand
Lead a saddled horse to the middle of the manage and stand so that you are by his left shoulder blade. Let the reins hang loose on his neck. Grab the left rein with your left hand and try to gently direct your horse's muzzle to the left. Next, press his barrel between the shoulder blades with the thumb of your free (right) hand. Do it slightly behind the girth, where theoretically your calf will be when you're in the saddle. This will encourage your horse to break free from the pressure. Your horse should take a step to the side with his back legs (to his right side) and his croup should now be half a step from you. This works the same as with moving your horse while cleaning and saddling - the girth and halter keeps the horse's front in one place, while you cause him to move his croup by applying pressure.
If your horse don't move while pressed, try to use a dressage whip instead of your thumb. Experiment with the place where you put pressure, maybe you've chosen a wrong one, which is why your horse is indifferent to it. Sometimes placing the pressure a few centimeters closer to the croup can cause better reaction from the horse. You have to trial-and-error your way to the "perfect" place. However, remember to stay within the area of the calf, so don't press your thumb too far back ;)
While working from the ground, always ask the horse to take only one step, so he would associate one-time pressure or touch of the whip with one step that he has to take. Take breaks between each step, so your horse can understand and learn it. There's no need to rush. When your horse takes 2-3 steps with the back legs under pressure, lead him slightly forward, turning and changing sides. Ask him to do the same to the other side, putting some pressure, this time on his right side, and make him move his croup and take steps with his back legs to the left. Depending on how fast he learns this exercise, give him a couple of a dozen trainings for that, before you go to the next phase of training.
The horse moves his croup to the side under pressure, source: practicalhorsemanmag.com, phot. Amy K. Dragoo
Turns on the front: teaching from the saddle with the help of someone from the ground
For the next training phase you'll need someone to help you from the ground. While sitting in the saddle, ask your aide to stand next to your horse's left shoulder blade (exactly like a person working with the horse from the ground). Keep regular contact on the reins, not allowing your horse to move forward. Ask him to slightly turn his nose to the left by gently using your left rein. At the same time, the right rein stays taut and keeps the horse from bending too much to the left. Next, use your calf in the place where you used your thumb/whip earlier, namely behind the girth on your horse's barrel. As soon as your horse takes a step, reward him by releasing pressure and relaxing your legs. This is why you've been teaching your horse that one signal means one step. That will allow you to teach him proper retreat from pressure.
If the horse does not react to your calf, ask the person on the ground to press his/her thumb next to your leg while you use your calf again.
Repeat the exercise to the other side. By repeating this exercise regularly with each training, your horse will understand what you want from him when you press your calf moved to the back against him.
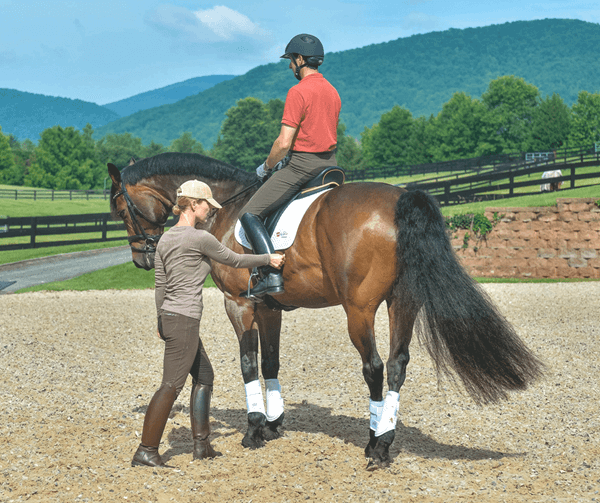
An aide on the ground, source: practicalhorsemanmag.com, phot. Amy K. Dragoo
In the next phase: ask your horse with your left calf to take one step with his back legs and move his croup to the right. Reward him, releasing the pressure. Next, ask him to take one step to the other side (left) by using your right calf. As soon as he obeys, release the pressure as a reward for properly performed exercise.
If your horse answers properly to your demands, you can try performing those exercise without an aide on the ground. With time you can increase the number of steps up until you take a full turn on the front. Full turn means 180 degrees. So you should end up in the same straight line on which you started, but now your head is facing the opposite direction.
Your goal should be to make turns on the front by using pressure of one calf, pressed in the right plac without the aid of reins. Remember not to let your horse to move backward or forward. His front legs should stay in one place. While making a turn to the right, your horse should go around his front right leg, and while making a turn to the left, he should go around his left front leg.
Step 2 - moving forward and to the side
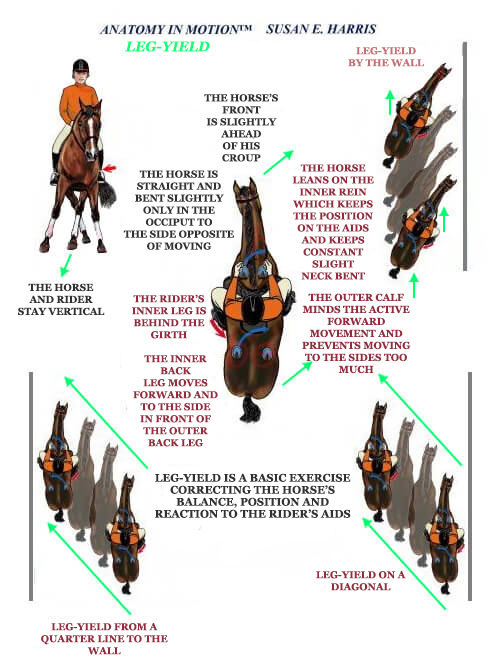
In the next phase we introduce leg-yield on a very short diagonal - a quarter line to the wall. Horses find it easier to move from the middle of a manage to a wall. A small distance between the quarter line and the wall will prevent applying extensive pressure and you won't demand to much from your horse at once.
Leg-yield at a walk
Start leg-yield at a walk, turning to the quarter line (quarter line is the one placed at 1/4 length of the manage, parallel to a wall). While approaching the quarter line parallel to the long wall, ride straight for a moment. Then bend your horse slightly to the center by pressing your calf slightly against him right behind girth, around which your horse will bend. The horse is supposed to bend to the opposite direction than that of moving. It's a beginner's exercise, because a real, proper leg-yield shouldn't be performed with a bent.
Use your inner calf like when you did while turns on the front, adjusting its action to the pace of your horse's walk. Your horse should continue the movement forwards at the same time slightly shifting towards a wall, to the outside. Try to think about even pressure of your calf, so you would distribute the action of pressing and relaxing according to the walk's pace. It should look, more or less, like this: calf press - horse's step and pressure release. The moment of pressure release should come about the same time when your horse begins taking a step.
If it's necessary, use halfhalt on your outer rein and alternatively increase and decrease its pressure to balance your horse's pace and not allow the shoulder blade to "fall out." Try to do it smoothly at your horse's walk pace.
Your goal here is to introduce your horse to the next level of understanding how your legs work. If the horse is not responding properly to your signals, e.g.: he accelerates, try to remind him by using halfhalt - pressure of the reins, that he doesn't have to rush anywhere.
Remember not to ask too much of your horse at once. 2-3 proper steps in leg-yield will be enough, then straighten your horse so he rides parallel to the manage's wall again. On one straight line between the quarter line and the wall, try to perform a few of such short repetitions of leg-yield, always alternating it with straightening your horse.
Try to perform a couple of leg-yields in both directions and give your horse a day so he can think through his new experience. During next trainings ask him to perform more and more steps in one straight line, until you reach leg-yield on the whole length of a wall.
Remember that the goal of the whole training is for your horse to start taking longer steps by engaging his rear legs and through the aid of your calves. Along with time and (proper) repetitions of leg-yield, your horse will understand what your aids - calves - mean. However, it's not worth asking your horse to perform more advanced leg-yield on a "deeper" diagonal (that means, e.g. from the wall to the middle line, or from the middle line to the wall - so on a wider stretch). Of course, in the future that would be a great idea, but remember that you won't teach your horse everything at once. Focus on the goal - lengthening steps and achieve it by following the right path.
Leg-yield at a trot
When your horse can properly perform leg-yield at a walk, try to shift to a trot and do it in both directions. The easiest for you would be to try it at a seated trot, because then you have the best control over your horse's body. That will also allow you to keep proper pace of using both your calves - applying and releasing pressure. Due to seated trot you won't try to keep continuing and strong calf pressure, which would provoke your horse to negative reaction.
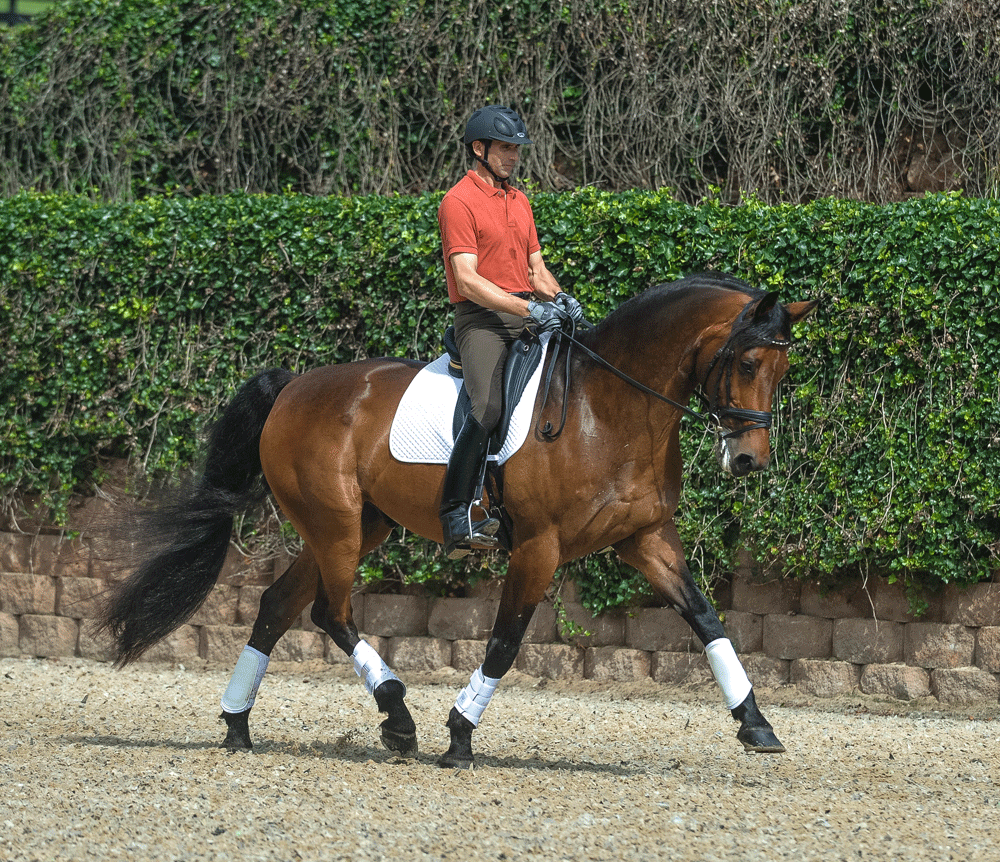
Step 3 - lengthening steps
If performing leg-yield at a trot in a "shallow" diagonal is an easy task for you and your horse, you can try to introduce an exercise for lengthening the step. Enter the quarter line and begin leg-yield to the wall. Allow the shoulder blades to "go" first, slightly preceding the croup movement. By pulsating action of your calf (applying and releasing pressure), try to lengthen its action, dragging each phase for a second, both the phase of applying and the phase of releasing pressure. This slight lengthening of the aids' action will encourage your horse to lengthen his phase of "suspension," i.e. raising his leg over the ground before he takes a step. His front limbs will be forced to move forwards a little farther, at the same time making space for the action of his back legs, which would have to take a bigger and deeper step under his belly.
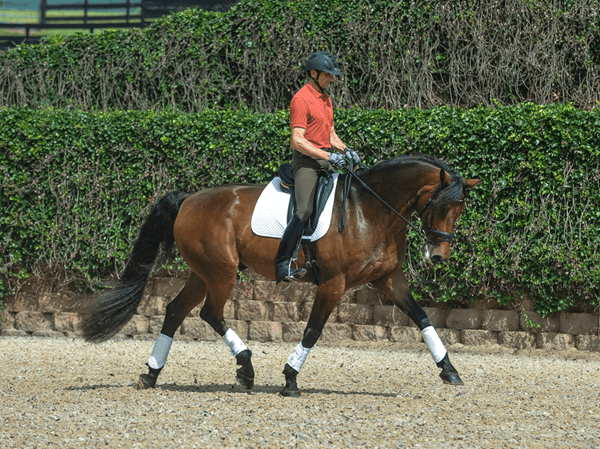
source: practicalhorsemanmag.com, phot. Amy K. Dragoo
It's an important moment of training, in which you have to control your balance so you won't disrupt your horse's balance. Try not to lean forward. Keep a still pace of the trot, without accelerating. Also try to keep constant contact with your horse's muzzle. Many riders try so hard to lengthen their horses' steps that they forget about the contact and are afraid to pull the reins. Unfortunately, without proper contact your horse may try to speed up his gait, even shift into a canter.
By keeping light contact, you will encourage your horse to stretch and move his nose forward, which will allow him to release some of the energy generated by the croup and rushing through his back all the way to the withers and occiput. That, in turn, will help him to push away with his back legs, so his steps become longer.
Remember to reward your horse for every positive reaction and each properly performed step, no matter how small it may be. Give him time to understand your expectations and to learn new commands.
In the next phase you would be able to demand even more lengthening of the steps during leg-yield, until your horse can perform it on the whole length of a wall.
All in all, when your horse feels comfortable and self-confident while lengthening his steps, you could lose the bent and lengthen the steps in straight and diagonal lines of the manage.
Second method
Working with bars - steps lengthening
Another way to teach your horse how to lengthen his trot is to work with bars. Start with placing one bar on the ground. Ride over it at a walk a couple of times, aiming through the very center and trying to keep the horse straight both a few steps ahead and a few steps behind the bar. The horse should be moving perpendicularly to the bar.
Then, go over the bar at a posting trot, keeping light contact with the horse's muzzle. Make sure that your shoulders are directly above your hips and ankles. Don't make unusual movements with your calves, just try to maintain still pace of the trot, not allowing your horse to slow down suddenly.
Then, ask an aide on the ground to adjust distances between two parallel bars based on your horse's movement. If you are on a sandy manage, it's good to even the ground around the first bar and go over it before you add another one. Your horse will leave marks on the sand, which will allow you and your aide to properly adjust the distance between the first and the second bar (usually it's between 110 and 140 cm, depending on your horse's size and build).
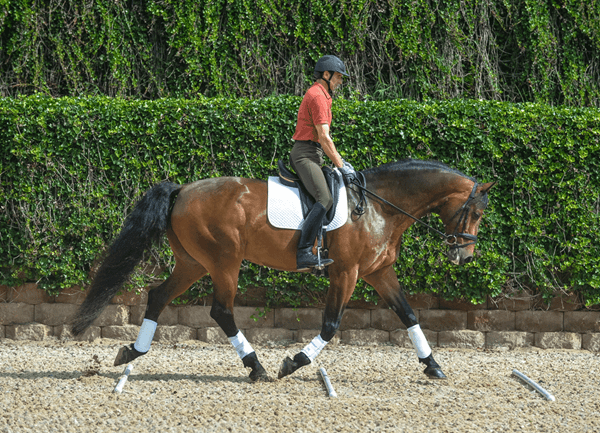
Bars placed for a working trot, source: practicalhorsemanmag.com, phot. Amy K. Dragoo
Ride over both bars through their center, moving in a straight line. Add a third bar, keeping even distances between each. Try to go over the bars at a seated trot while maintaining light contact with your horse's muzzle and a balanced position of your body. "Close" your horse with your calves, giving him signals according to the trot steps' pace by applying and releasing pressure. Go over the bars in both directions a couple of times.
When your horse feels completely comfortable and relaxed while moving over the bars placed at natural distances for his working trot, ask the aide on the ground to increase the distances between the bars. Now, while going over the farther away placed bars, try to lengthen the time of applying and releasing pressure with your calves to force your horse to take longer steps.
Remember to let your horse stretch his neck and stick his nose forward. But don't allow to lose contact with his muzzle, as this would give him a chance to speed up the trot.
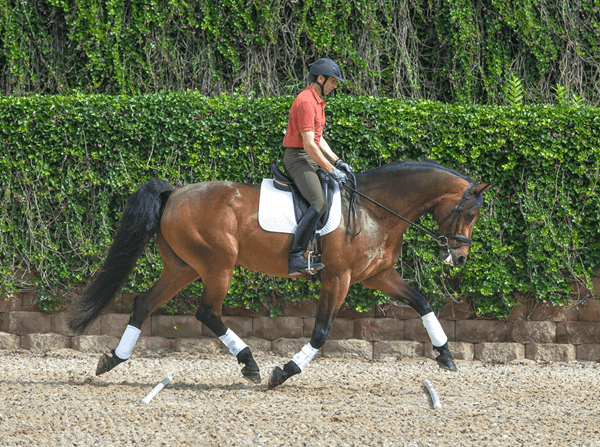
Increased distance between the bars for an extended trot, source: practicalhorsemanmag.com, phot. Amy K. Dragoo
After a couple of repetitions, ask the aide on the ground to make the distances between the bars even bigger. Try not to change the distances too roughly and don't place them too far away from each other. That would stress out your horse and cause him to lose his self-confidence. Remember to "raise the bar" with each training, demanding him to take longer steps. But also don't forget that your horse cannot extend his steps infinitely. Every horse has physical limitations :)
If the distance is too great and your horse got lost, hitting the bars with his legs, ask the aide on the ground to place the bars closer to each other and go over the bars again. This time is surely will go well. It's the moment where you should end your training with an exercise for lengthening the steps on the bars. Always try to finish trainings with something positive, with a well-performed exercise that you know is within your horse's reach. The horse has to finish trainings with the thought of a well-performed task and knowing that his rider is content. This will pay off by the next training - your horse will enter the manage happy and willing to work with you again.
By the next rides try to lengthen your horse's steps even more, and then, gradually, eliminate the bars and try to perform the lengthening without them, just with your calf signals.
Summary
There are many ways of reaching the goal. Methods presented above are the most common and popular ones, which will allow you to teach your horse how to lengthen his steps at a trot. Which method should you choose? It's up to you. Remember that the methods don't necessarily have to eliminate each other. On the contrary, they may complete one another.
However, no method will work if you demand too much and too quick from your horse. The "baby step" method is always the best when it comes to teaching your horse :)
 Product successfully added to your shopping cart
 source: practicalhorsemanmag.com, phot. Amy K. Dragoo